You’ll sometimes see SHA-256 hashes displayed next to the file download links during your internet travels, but not really known what they are. These strings of text allow you to verify that files you download aren’t corrupted or tampered with. You can do this with the commands built into Windows and macOS.
How Hashes Work, and How to Use Them for Data Verification
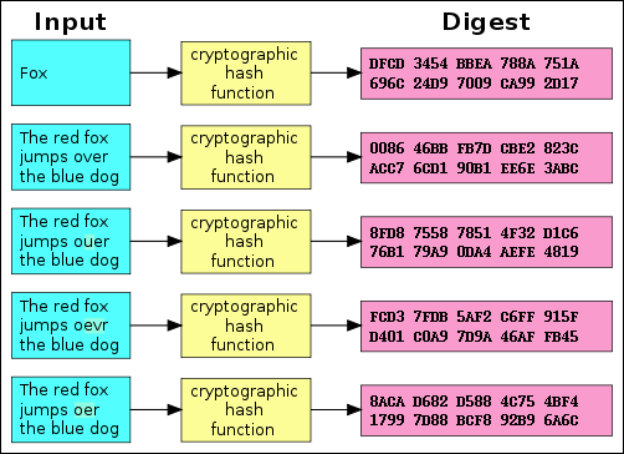
Hashes—the string of characters—are the products of cryptographic algorithms. Often these strings have a fixed length, regardless of the size of the input data. Take a look at the above chart and you’ll see that both “Fox” and “The red fox jumps over the blue dog” yield the same length output.
Now compare the second example in the chart to the third, fourth, and fifth. You’ll see that, despite a very minimal change in the input data, the resulting hashes are very different from one another. Even if someone alters a very small piece of the input data, the resulting hash will be significantly changed.
Software creators often hash their own download file, which they then offer as an official hash on their websites.
That way, you can download the file and then run the appropriate hash function to confirm you have the real—untampered with—original file and that it hasn’t been corrupted during the download process. As we saw above, even a small change to the file will dramatically change the hash.
Hashes provided directly by the software developer can also be useful if you have a file you have gotten from an unofficial source and you want to confirm that it’s legitimate. Let’s say you have a file you got from somewhere and you want to confirm it hasn’t been tampered with. You can look up the hash of that specific file online on the developer’s website. You can then run it through the hash function on your computer and confirm that it matches the hash value you’d expect it to have. This confirms the file you have is the exact same file being offered for download on the developer’s website, without any modifications.
How to Compare Hash Functions on Windows or macOS Operating Systems
With that in mind, let’s look at how to check the hash of a file you downloaded, and compare it against the one you’re given. Here are methods for Windows and macOS. The hashes will always be identical if you’re using the same hashing function on the same file. It doesn’t matter which operating system you use.
Windows
This process is possible without the use of any third-party software on Windows thanks to PowerShell.
To get started, open a PowerShell window by launching the “Windows PowerShell” shortcut from your Start menu.
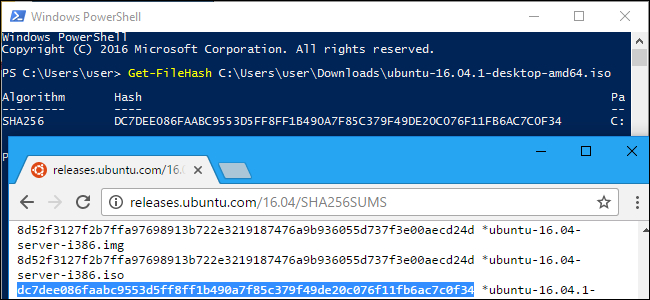
Run the following command, replacing “C:\path\to\file.iso” with the path to any file you want to view the hash of:
Get-FileHash C:\path\to\file.iso -Algorithm SHA256It will take some time to calculate the hash of the file, depending on the size of the file, and the speed of the drive the file is on.
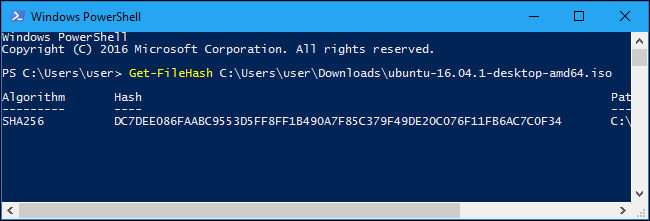
*Note, the default hash algorithm used by windows is the preferred SHA-256.
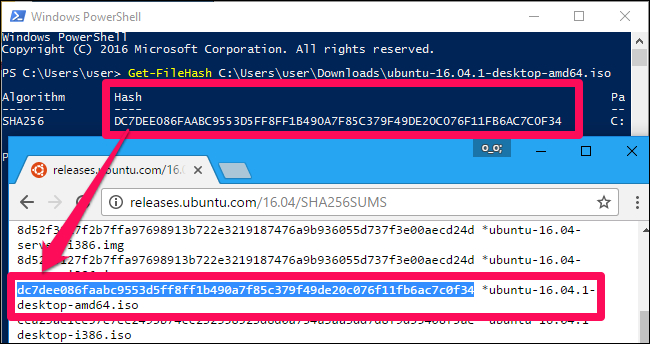
Compare the result of the hash function you just generated to the result you expected to see. If it’s the same value, the file hasn’t been corrupted, tampered with, or otherwise altered from the original.
macOS
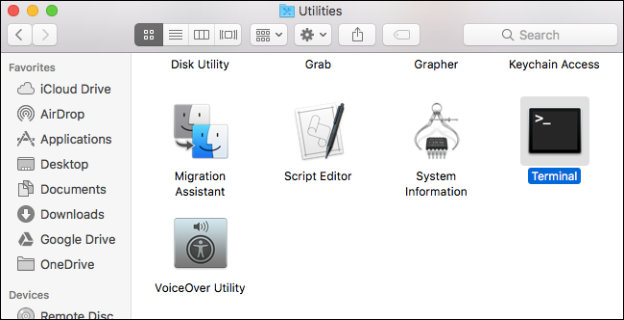
macOS includes commands for viewing different types of hashes. To access them, launch a Terminal window. You’ll find it at Finder > Applications > Utilities > Terminal.
To show the SHA-256 hash of a file, run the following command:
shasum -a 256 /path/to/file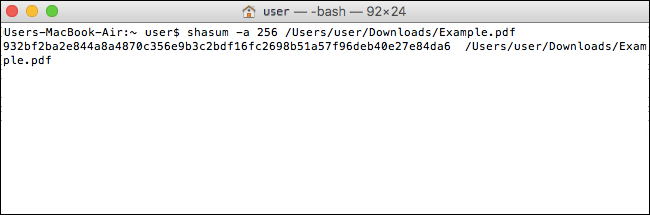
Image Credit: Jorge Stolfi/Wikimedia